 If you
are interested in getting thousands of mp3-files on your computer
using only 128 Kb of ROM, read on! Yesterday I made my hands dirty and
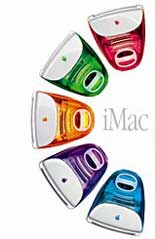
with Jan’s help upgraded two 6 Gb colored iMacs (a blue and a
pink one) to potential servers for our home-network having a 80 Gb resp.
a 120 Gb hard disk. If you do the installation yourself such an upgrade
costs you roughly 1 Euro/Gigabyte which seems to me like a good
investment. Clearly, you need to know how to do this and be less
hardware-phobic than I am. Fortunately, the first problem is easily
solved. There is plenty of good advice on the net : for the colored
iMacs we used the upgrade an iMac-page of MacWorld. For possible
later use, there is also a page for replacing the hard disk in an old iBook
(which seems already more challenging) and in a flat screen iMac (which seems to be impossible
without proper tools). Anyway, we followed the page and in no time
replaced the hard disks (along the way we made all possible mistakes
like not connecting the new hard disk and then being surprised that the
Disk Utility cannot find it or not putting back the RAM-chips and
panicking when the normal start-up chime was replaced by an aggressive
beep). An unexpected pleasant surprise was that the blue iMac, which I
thought to be dead, revived when we replaced the hard disk.
Back home, I dumped a good part of our CD-collection on the blue
iMac (1440 songs, good for 4.3 days of music and taking up 7.11 Gb of
the vast 120 Gb hard disk) to test the iTunes Central hack
explained by Alan Graham in his six
great tips for homemade dot mac servers. Would I manage to get the
entire collection on my old iBook which had only (after installing all
this WarWalking-software) 800 Mb of free disk space? Here is what
I did :
1. On the iBook (or any machine you want to
play this trick on) go to your Home/Music/iTunes-folder and drag
the two files and one directory it contains to the Trash. Do the
same for the two files com.apple.iTunes.eq.plist and
com.apple.iTunes.plist which are in the
Home/Library/Preferences-folder.
2. On the
iBook, use the Finder/Network-icon to connect to the server
(iMacServer in my case) and browse to the iTunes-folder where you placed
all the music (still, on the iBook in the Finder-window opened when you
connect to iMacServer). Make an Alias of the two files and the
directory in it (click on one of them once, go to the
File-submenu of the Finder and choose Make Alias) which
results in three new entries in the iTunes directory : iTunes 4 Music
Library alias, iTunes 4 Music Library.xml alias and iTunes
4 Music Library alias. Drag these 3 aliases to the
Home/Music/iTunes-folder on the iBook and rename them by removing
the alias-addendum.
3. In the Finder-window on
the iBook corresponding to the iMacServer browse to the
Home/Library/Preferences-folder and drag the two files
com.apple.iTunes.eq.plist and com.apple.iTunes.plist to
the Home/Library/Preferences-folder of the iBook. Launch
iTunes and it will give you access to the whole iTunes-collection
of iMacServer! In all, the three aliases and the 2 copied files take up
128 Kb…
Comments